Tuesday 25 September 2012

How to Make Bath Fizzies


Martha Stewart Living, Holiday 2006
All it takes to make delicately scented tablets is a little mixing, some gradual spritzing, and a few minutes of molding. When you're finished you'll have dozens of effervescent treats in a variety of shapes and colors that will scent and soften bath water as they bubble. Stuff stockings with cellophane bags filled with stacks of the colorful blocks. They make great gifts for all the ladies on your list, including mothers, grandmothers, aunts, and grown-up nieces. Experiment with colors and scents; mix yellow and red to make orange, for example, and try blending lemon with lavender.

Tools and Materials
  • Baking soda
  • Cornstarch
  • Citric acid
  • Spritzer bottles
  • Food coloring
  • Glass bowl
  • Essential oil
  • Baking molds
How-To
1. Sift 1 3/4 cup baking soda, 1 cup citric acid, and 2 cups cornstarch through a sieve to remove chunks. To make different tints, fill small spritzer bottles with water and add about 6 drops of food coloring to each.
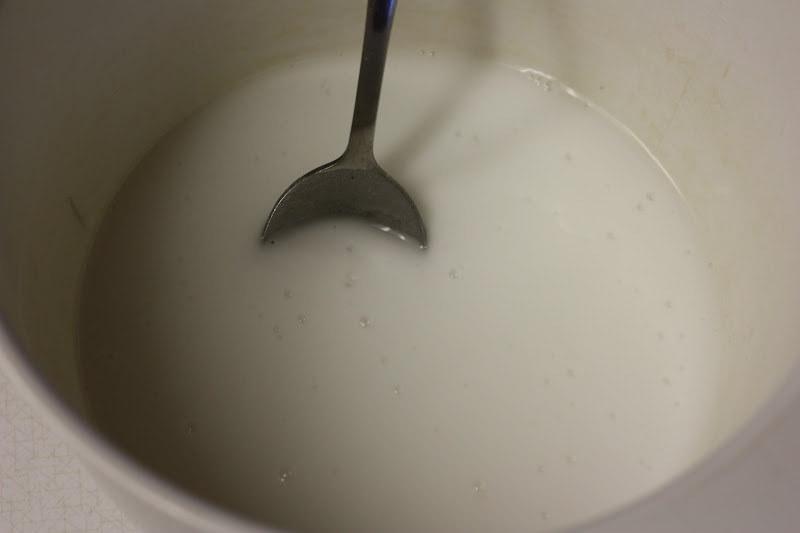
2. Pour 1 cup of powdered mixture into a glass bowl. Lightly spritz, stirring after each spritz, until powder is desired color. Add water slowly, so mixture does not fizz. If mixing two tints, alternate colors as you spritz. Check the consistency of powder with your fingers; when it can be tightly packed or shaped, stop spritzing (this may take a little while).
3. Select an essential oil. Add 5 drops if it's one of the stronger scents (peppermint, lavender), 6 if it's a weaker one (lemon, grapefruit). Mix well. Firmly pack mixture into small baking molds. We used 1/4 cup for each fizzy, which is good for one bath. Allow mixture to set for 2 hours, then pop out carefully. Repeat with different tints for remaining powder.

Edible glitter


1/4 cup sugar, 1/2 teaspoon of food coloring, baking sheet and 10 mins in oven to make edible glitter....

Easy Slow Cooker Chicken Wings


Ingredients
2.5kgs pounds chicken wings, split and tips discarded
1  bottle chilli sauce
1/4 cup fresh lemon juice
1/4 cup molasses
2 tablespoons Worcestershire sauce
3 drops hot pepper sauce
1 tablespoon salsa
2 1/2 teaspoons chili powder
1 teaspoon garlic powder
2 teaspoons salt
Directions
Place chicken in slow cooker. In a medium bowl combine the chile sauce, lemon juice, molasses, Worcestershire sauce, hot pepper sauce, salsa, chili powder, garlic powder and salt. Mix together and pour mixture over chicken.
Cook in slow cooker on Medium Low setting for 5 hours.

Free Printable Kitchen Wall Art


 first printable is a 4 x 6 message  
 second printable is a 5 x 7 print. 
The third print is another 5 x 7 
Olive You

Lettuce Turnip the Beet (Let Us Turn Up the Beat)

Click on the printables pictures in order to download a copy for yourself


Home made dry shampoo


Have you heard all the fuss about dry shampoo?  It’s seems like it’s all anybody talks about these days: dry shampoo this, dry shampoo that.  What’s the world coming to?
dry shampoo
I’ll tell you what all the fuss is about: all the fuss is about catching an extra 15 minutes of snooze time in the morning.
You know those days you have a hard time getting out of bed, you miss the alarm, and you throw your hair back in a ponytail to hide the grease?  That’s where dry shampoo comes in.  Sprinkle a little bit of this stuff on and you’re out the door with grease-free locks in a jiffy.  Love that.
dry shampoos
The thing is this: dry shampoo is pricey.  And you know how I don’t love the pricey.  I figured it wasn’t rocket science to make your own, and guess what?
I was right.
Here are the ingredients to make your own dry shampoo:
  • 2 Tablespoons Cornstarch
  • 2 Tablespoons Baking Soda
  • 2 Tablespoons Cornmeal
  • 2 Tablespoons Ground Oatmeal
  • A salt shaker type container to store dry shampoo
You probably have all of this lurking in your pantry.
Step 1:
Grind up oatmeal in a blender.  You want it to be fine enough to be able to go through a salt shaker, so give it some time in the blender.
home made dry shampoo
Step 2:
Measure out 2 tablespoons each of: cornstarch, cornmeal, baking soda and the ground up oatmeal.  Mix it all together in a bowl and you’ve got yourself some dry shampoo.
salt shakers
Step 3:
Pour your fancy new dry shampoo into a container.  You want this to be something you can use over and over again, in the bathroom in your morning rush, so put it into a reusable salt shaker or something of the sort.
dirty hair
Step 4:
Behold the greasy hair.
{Balding due to my favorite neighborhood disease, Lupus.  Don’t make any comments about it, I’m extra sensitive.}
Step 4 is all about embracing the fact that greasy hair is not desirable.  Skip straight to Step 5 for the skinny.
Step 5:
Sprinkle some dry shampoo onto your hand.  Or sprinkle it straight onto your scalp.  This is your head, I’ll let you make the executive decisions here.
what is dry shampooing
Now this part, it’s a little ugly.  This is where you have enough stuff in your hair to feel like you have really bad dandruff.
This too shall pass.
how to use dry shampoo
You might want to do this over a sink or tub, it’s a tiny bit messy.
Step 6:
Shampoo.
using dry shampoo
Scrub your head like you would in the shower, all lathered up.  This is where all the ingredients you’ve so carefully blended gather all the oils on the top of your head.
Step 7:
Now brush.  Use a bristle brush or it won’t work properly. Again, do this over a sink or tub.  Brush like you’ve got the wind at your back.  You need to get all this stuff off your scalp, and hurry!
Not really, but you get the idea.
hair brush
Step 8:
That’s it!  You’re all dry shampooed.  And even if you don’t smell like a million bucks, you sure look like it.
Style your hair like you normally would, and pat yourself on the back for the extra 15 minutes of sleep you managed to score.  You’re smart like that.
cleaning hair with dry shampoo
Dry shampoo, in 10 steps or less.
Article by Allison Czarnecki at Petit elefant

Home made teeth whitening


Put a tiny bit of toothpaste into a small cup, mix in one teaspoon baking soda plus one teaspoon of hydrogen peroxide, and half a teaspoon water. Thoroughly mix then brush your teeth for two minutes. Remember to do it once a week until you have reached the results you want. Once your teeth are good and white, limit yourself to using the whitening treatment once every month or two.

Facial Mask For Acne And Open Pores


facial mask1 skin care heath and beauty tips Our facial skin is very sensitive and hence can easily get infected. We need to pay special attention toward our skin care, if we want our facial texture to maintain a healthy balance.
Acne usually occurs, when open pores that are present on the skin develop into clogged, which in result get infected by bacteria. There are many reasons that can cause you acne problem which includes imbalance diet, hormone imbalances, stress and poor hygiene. We are sharing with you home made remedy for acne problems and open pores.

Facial Mask For Acne And Open Pores

Egg White contains protein which can help us rebuild and heal our damaged skin and also it helps to temporarily shrink the pores as well and on the other hand Vitamin E works as an antioxidant agent which put up a fight against the free radicals, which affect the healing process of skin. Here we are sharing a facial mask of these natural healing agents to make your skin healthy and radiant.
Take a Vitamin E capsule and open it on your face so that oil present in the capsule fall on your face and then give your face a light massage and let it soak for 30 minutes.
Take egg white and apply it on your skin and let it soak for 30 minutes and then rinse with cold water.
These two home made remedies can help you get rid of your acne and open pores problems and with its regular use, your skin will become smooth and radiant within few days.
By Madiha at Style pk

Homemade Vicks Vapor shower disks


Sarah's Homemade Vicks Shower Disk Thingies
-1 cup Baking soda
-1/3 Water
-Essential oils: eucalyptusrosemary, and lavender
-Muffin tin
-Muffin liners

1) Add baking soda to a mixing bowl.  
2) Slowly add water until you've made a thick paste. add just a little water a time.  You'll want the mix to feel like putty.
3) Add 15 drops of each essential oil.
4) Spoon in to a muffin tin, and let sit out for 12-18 hours.  You can also bake these, but I just left them out overnight.
5) Pop these suckers out of the paper liner, plop it in your shower, and let the essential oils steam away your stuffy nose.  Edited to add: put them anywhere on the floor of the shower; it doesn't matter where!  

By Sarah at Frugal by choice

Ice flowers


Make ice in the bottom of plastic bottles, looks like a flower...float in a bowl of punch...so cute!! Add a few drops of food colouring to make a coloured flower

hanging herb garden

You will need:
Scrap of wood
Empty 2-litre plastic bottles
Batting
Fresh herbs
Potting soil
Some small screws
2 picture hooks
2 concrete nails
Hammer

Optional:
PC printed stencil
Craft acrylic
Paintbrush


Here's how:
1. Cut a piece of board to the size that you want your hanging herb garden.
It should be approximately 20cm wide and long enough to accommodate the amount of herbs you want to place in the herb garden.

2. Attach two picture hangers to the top of the board at the back, for mounting onto the wall.


3. Use a craft knife to cut the top section off the cold drink bottles.
If you look at the empty bottle you will see a moulding line at the top, and you can use this to cut a straight line.

4. Space evenly along the length of the board to allow for growing height, and fasten the tops onto the board with small screws.


5. Use a piece of bundled up batting to fill in the neck of the bottle.
This prevents the soil from falling out!
Only place a small amount of potting soil into the container for the time being, as the soil from the potted herb will take up quite a bit of space.
Plant the herbs into the container and fill up with soil, leaving at least a 1cm gap between the level of soil and the top of the container.


Now you are ready to hang your herb garden in a sunny spot just outside the kitchen door. Measure where you want it to hang and hammer in two concrete nails.


Home to make a pinata


Today, we’re talking DIY pinatas!
Here’s what you’ll need:  some cardboard, an empty cereal box, tissue paper, masking tape, scissors, a glue stick, and pipe cleaners or thick twine. Start by cutting the shape of your pinata out of your cardboard. Cut out two identical pieces of your shape. I chose a number one, of course! Dimensions can be up to you; this number one is about 18 inches tall.
Next, cut out strips of your cereal box to use on the sides of your pinata. For this 18-inch tall pinata, I used strips that were three inches wide. Assemble your cardboard shapes and strips from the cereal box using plenty of masking tape, matching the edges neatly. Leave a flap open and untaped at the top of your pinata.
Next, prepare your tissue paper: leave paper folded as it comes in a fresh package, and cut of a two-inch-wide strip of folded tissue paper. Snip fringe about halfway up one side of the folded tissue paper. Unfold, and you should have a long strand of fringed tissue. Use as many colors as you’d like!
Once all of your tissue is fringed, grab your glue stick and start applying the fringe to the pinata form, starting at the bottom and working your way up. Overlap the tissue so that the only portion that shows is the fringe, and the un-fringed part is what gets glued down.
When you’ve covered the pinata, cut small holes on the open flap at the top, and corresponding holes on the top in a section that is taped down. String a pipe cleaner or twine through the holes to seal the top of the pinata. (If you’re filling the pinata with candy or treats, you can use the open flap to get your goodies inside!)
After you’ve sealed the pinata, string it up and admire! You can use them purely for decoration, or put it to use  – grab a bat and knock it around! This little project is an absolute blast to make, and even more fun once it’s done. Have a ball!

Written by chelsea 

Natural weed killer

Materials:
  • spray bottle 
  • Pickling vinegar (It works better than regular vinegar because the acetic acid % is higher)
  • Salt (1/2 cup for medium size bottle)
  • Dish soap (a squeeze)


Fill a spray bottle almost full with Pickling vinegar. Add the salt. Squirt in a dash of dish soap into the bottle. Close the bottle tight and shake, shake, shake. You are done!!!

By Stephanie at Full of great ideas

BBQ Potatoes


Ingredients:
1 1/2 pound potatoes (equal sized)
1 grated garlic clove or 1/4 to 1/2 tsp garlic powder
chicken or vegetable broth
tiny cubes butter
minced parsley
pepper and salt
Optional: lime or lemon juice

Directions:

Get your BGE (or oven) going and keep it steady at 350Fº (175Cº).
Use an ovenproof dish. Place the peeled and washed (even-sized) potatoes in there and make sure they fit snuggly together.
BBQ Potatoes
Add the grated garlic or powder to the broth and heat it for a minute to get the flavors going. Pour hot broth in there until there’s about 1 inch of broth in the dish and sprinkle a little salt and pepper on top of the potatoes.
BBQ Potatoes
Place a tiny slice of butter on top of each potato. As the potatoes start to cook the butter will melt all over, it’s delicious. Not diet-friendly, but very tasty.
BBQ Potatoes

Maybe I should have called them BBQ Butter Potatoes? Oh well.
 
Place the dish in your BBQ or oven and give them 35 to 40 minutes. Check them for readiness.
BBQ Potatoes
I gave mine almost 10 minutes extra. Mainly because I really like a crunchy brown bottom-layer.
BBQ Potatoes
Sprinkle the potatoes with finely minced parsley and if you really want to up the flavors: squeeze some lime or lemon juice on top. It’s crazy good.
BBQ Potatoes